The Minimally Adjustable Two Jaw Chuck
By our Secretary, Pete Hatherell
I’ve made a few one-piece scoops over recent years, a simple project but with a couple of slightly tricky points.
It is a two-stage process, starting with some spindle turning to create a sphere on the end of a handle, the first
tricky bit as it does need to be a fairly true sphere to ensure that the walls of the bowl are of even thickness all
round. In the second stage, the sphere then needs to be held centred for hollowing out, with the handle at
right-angles to the axis of rotation. I have made sets of jaws, using the Axminster wood jaw plates, to grip the
bowl. The problem I have had, however, has been that the jaws mark the outside of the scoop bowl unless
they are exactly the right size. Making these jaws is not hard but is a time-consuming process and a full set is
needed for each size of scoop, so I gave thought to an alternative means of holding it for hollowing. The
alternatives that I have come across include using a standard chuck with one jaw removed to accommodate
the handle (I got terrible vibration when I tried this, due to the imbalance) and making a doughnut chuck (more
on this later). I was thinking along the lines of a jam-chuck but jamming a sphere with a handle into a hole in a
block of wood has its own difficulties, not least that exact precision is needed to get the size right; one scrape
too far and there’s no putting the wood back. I came up with the following idea to get round these problems.
The idea is simple and is based on a jam chuck, but with some adjustability. I used a 12-hole face plate and a
couple of lumps of an old fence post, though any suitably sized scrap wood would do. The face plate is
screwed to the two pieces of wood with a small gap between them, the gap aligned across the centre of the
plate. The reason for the gap will be explained below. Balance and face off the pieces of wood.
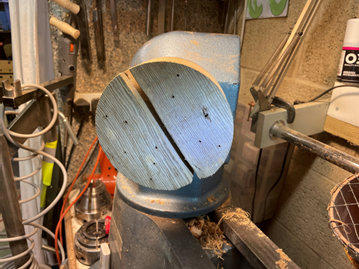
Turn a hollow to accept the scoop. This should be just a shade smaller than the scoop bowl and a little over
half the diameter of the bowl deep. Try to make the hole spherical in shape with a bit of undercut. With the
plate off the lathe, cut a channel along the gap to one side of the hole to accommodate the handle. The size
of this is not critical, as long as it’s big enough.
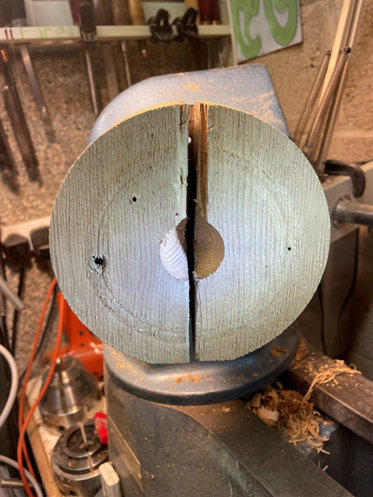
At this stage, the scoop should not quite fit into the hole. With the plate off the lathe, loosen the screws.
This will allow some movement between the two blocks of wood, hence “minimally adjustable” and, if the
hole is the right size, the scoop can now be pushed in. The screws are re-tightened which draws the blocks
back towards their original position, gripping the scoop. Tighten them progressively, swapping sides to get
an even pressure from both blocks, to ensure that the scoop remains centred. If the hole is too small and
the scoop still can’t be pushed in, the blocks can be put back on the lathe and the hole enlarged a tiny bit. If
you’ve gone slightly too far, use a piece of paper towel round the scoop to tighten things up.
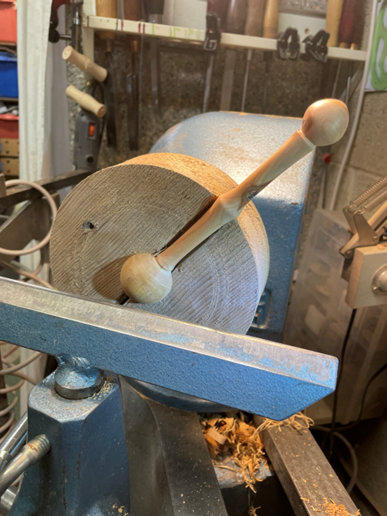
The bowl can now be hollowed out in the normal way. This is where the gap between the two blocks
becomes useful. Because it is possible to see down between the two blocks, the bottom of the bowl is
visible and a depth gauge can be set to ensure that the bowl is hollowed out fully, with little risk of overdoing
it and going right through. This is why I don’t like doughnut chucks for this project; you can’t see the bottom
so setting the depth is less easy.
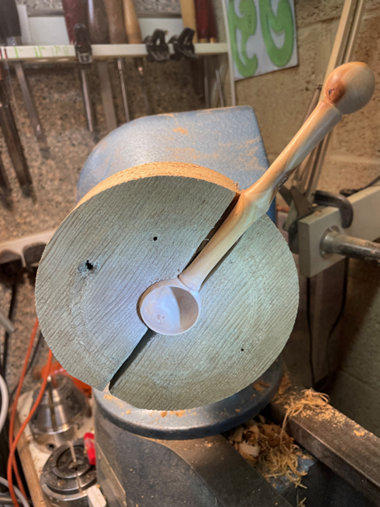
Compared to making a set of four jaws for a scroll chuck, this method is quick, cheap (you don’t need a set of
wood jaw plates), simple and works well. I don’t know if it is an original idea but I’ve not seen anyone using it
on YouTube. I’m not sure how well it would work when making larger scoops and ladles but I’m sure that it is
a method that could be applied to other projects.
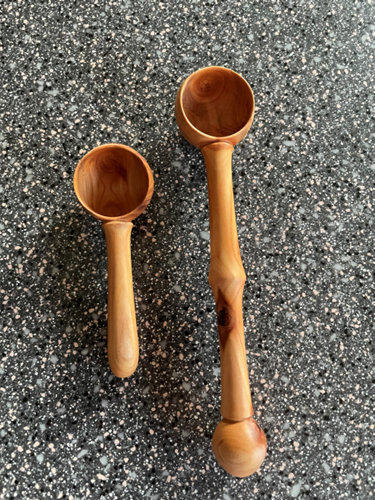
Two scoops made from cherry using the above method.
Peter Hatherell - June 2023


